When it comes to home construction and renovation, one of the unsung heroes of the building process is the subfloor. It’s an essential layer that provides stability and support for the finished flooring. In this comprehensive guide, I’m excited to share my experiences and knowledge about three quarter inch tongue and groove subfloor – a vital component in many construction and remodeling projects.
Understanding Three Quarter Inch Tongue and Groove Subfloor
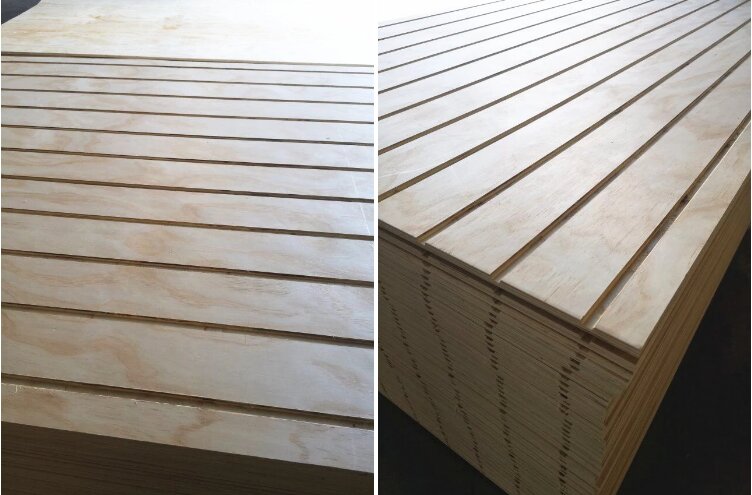
Three quarter inch tongue and groove subfloor, often referred to as 3/4 T&G subfloor, is a specific type of subfloor material. It’s constructed using sheets of wood that are precisely milled to have interlocking edges with tongues and grooves. This interlocking feature helps create a stable and strong foundation for your finished flooring, whether it’s hardwood, tile, or any other material.
My Personal Encounter
I first became familiar with three quarter inch tongue and groove subfloor during a home renovation project. The existing subfloor was showing signs of wear, and I knew it was time to upgrade to a more robust and stable solution.
How to use Three Quarter Inch Tongue and Groove Subfloor?
Using three-quarter-inch tongue and groove (T&G) subflooring, typically made from plywood or OSB (oriented strand board), is a common practice to create a strong and stable base for various types of flooring materials. Here’s how to use three-quarter-inch T&G subfloor:
Materials and Tools:
- Three-quarter-inch T&G subfloor panels
- Measuring tape
- Circular saw or jigsaw
- Screws or nails
- Screwdriver or nail gun
- Safety goggles and ear protection
- Construction adhesive (optional)
- Chalk line (optional)
- Level
- Carpenter’s square
Steps:
- Preparation:
- Ensure the existing floor framing or joists are level and free from any protrusions or irregularities. Repair or shim any areas that are not level.
- If you’re installing subflooring over an existing subfloor, make sure it’s clean and in good condition.
- Acclimation:
- If the subfloor panels have been stored in a different environment, let them acclimate to the room’s temperature and humidity for at least 48 hours before installation.
- Measure and Plan:
- Measure the room and calculate the number of subfloor panels you’ll need. Plan your layout so that the panels are oriented perpendicular to the floor joists. Stagger the seams between rows to create a more stable subfloor.
- Cutting:
- If you need to cut panels to fit the edges of the room, measure and mark the cut lines using a chalk line, straightedge, and pencil. Use a circular saw or jigsaw to make the cuts. Wear safety goggles and ear protection while cutting.
- Installation:
- Start in one corner of the room. Apply construction adhesive to the top of the floor joists or subfloor, if desired, to enhance the bond between the panels and the framing.
- Lay the first three-quarter-inch T&G subfloor panel in place with the groove side facing the wall. The tongue should be facing the center of the room.
- Ensure that the panel is snugly seated on the joists or subfloor. Use a carpenter’s square and level to check for squareness and level. If the subfloor panel is not level, shim it as needed.
- Secure the panel by driving screws or nails through the panel and into the floor joists or subfloor, following the manufacturer’s recommendations for fastener spacing.
- Continue installing the remaining panels in a staggered pattern, ensuring the tongue and groove connections are properly aligned and that each panel is level and securely fastened. Overlap the panels on the joists or subfloor.
- Edges and Corners:
- For edges and corners, measure and cut the panels to fit. Ensure that the tongue and groove joints fit securely with adjacent panels.
The Benefits of Three Quarters Inch Tongue and Groove Subfloor
Through my journey with this material, I discovered several benefits:
- Exceptional Strength: Three quarter inch tongues and groove subfloor is remarkably strong, capable of supporting heavy floor coverings and furniture without sagging or creaking.
- Stability: The tongue and groove design ensures a snug fit between sheets, reducing the risk of uneven or noisy floors.
- Ease of Installation: It is relatively easy to install, making it a practical choice for DIY enthusiasts or professionals alike.
- Versatility: Suitable for various types of finished flooring, this subfloor can accommodate a wide range of design preferences.
Now, let’s dive into a step-by-step guide for installing three quarter inch tongue and groove subfloor.
Step-by-Step Guide: Installing Three Quarter Inch Tongue and Grooves Subfloor
Step 1: Preparation
- Start with a clean, level, and dry surface. Ensure the existing subfloor is free of debris and structural issues.
- Acclimate the 3/4 T&G subfloor sheets to the room for at least 48 hours to prevent warping.
Step 2: Layout
- Begin laying the sheets along the longest wall of the room.
- Leave a 1/8-inch gap between sheets to account for expansion, and stagger the seams for added stability.
Step 3: Fastening
- Use construction adhesive on the subfloor joists before placing the sheets.
- Nail or screw the sheets to the joists, following manufacturer recommendations for spacing and fasteners.
Step 4: Reinforcement
- Consider adding blocking between joists to provide extra support and reduce flex in the subfloor.
Step 5: Inspection
- Carefully inspect the subfloor for any gaps, raised edges, or irregularities.
- Address any issues before proceeding with the installation of the finished flooring.
FAQs About Three Quarter Inch Tongues and Groove Subfloor
Q1: Is three quarter inch tongue and grooves subfloor suitable for all areas of the home?
While three quarter inch tongue and grooves subfloor is appropriate for most areas of the home, it may not be the best choice for high-moisture spaces like bathrooms. In such areas, marine-grade plywood is a more suitable option.
Q2: Is professional help necessary for installing three quarter inch tongue and grooves subfloor?
While it’s possible to install it as a DIY project, professional installation may be recommended for larger or complex projects to ensure a flawless result.
Q3: What is the best finish for three quarters inch tongue and groove subfloor?
The choice of finish depends on your design preferences and the type of finished flooring you plan to install. Options include paint, stain, or a clear polyurethane sealer.
Q4: Can I install radiant floor heating beneath three quarters inch tongue and groove subfloor?
Yes, you can install radiant floor heating beneath three quarter inchs tongue and groove subfloor, providing an energy-efficient and comfortable heating solution.
Q5: Where can I purchase three quarter inchs tongue and groove subfloor sheets?
You can find three quarters inch tongue and groove subfloor sheets at home improvement stores, lumberyards, and online retailers. Ensure you choose high-quality materials for the best results.
Conclusion
In conclusion, three quarter inch tongue and groove subfloor is an essential element in ensuring the structural integrity and longevity of your finished flooring. Through my personal journey with this material, I’ve come to appreciate its remarkable strength, stability, and ease of installation.
For more information on three quarters inch tongue and groove subfloor and other wood products, please explore CN-Plywood’s product page on HPL Birch Plywood and Caravan Thin Plywood.
I hope my experiences and insights have provided you with valuable guidance for your own construction or renovation projects. The three quarters inch tongue and groove subfloor is indeed an unsung hero, silently supporting the beauty and functionality of your home.
Post time: 14 10 月, 2023